Monday, April 14, 2014

Fundamentals of Digital Image and Video Processing - Week 2 Solutions

Hi coursera people,

I'm thrilled to take the course "Fundamentals of Digital Image and Video Processing". Matlab programming assignments have just started. The question 7 of week 2 involves some coding, which we are expected to write to get the right answers.

Here's the question :

In this problem you will implement spatial-domain low-pass filtering using MATLAB, and evaluate the difference between the filtered image and the original image using two quantitative metrics called Mean Squared Error (MSE) and Peak Signal-to-Noise Ratio (PSNR). Given two N1×N2 images x(n1,n2) and y(n1,n2), the MSE is computed as MSE=1N1N2∑N1n1=1∑N2n2=1[x(n1,n2)−y(n1,n2)]2. The PSNR is defined as PSNR=10log10(MAX2IMSE), where MAXI is the maximum possible pixel value of the images. For the 8-bit gray-scale images considered in this problem, MAXI=255. Follow the instructions below to finish this problem. (1) Download the original image from here. The original image is a 256×256 8-bit gray-scale image. (2) Convert the original image from type 'uint8' (8-bit integer) to 'double' (real number). (3) Create a 3×3 low-pass filter with all coefficients equal to 1/9, i.e., create a 3×3 MATLAB array with all elements equal to 1/9. (4) Low-pass filter the original image (converted to type 'double') with the filter created in step (3). This can be done using the built-in MATLAB function "imfilter". The function "imfilter" takes three arguments and returns one output. The first argument is the original image (converted to type 'double'); the second argument is the low-pass filter created in step (3); and the third argument is a string specifying the boundary filtering option. For this problem, use 'replicate' (including the single quotes) for the third argument. The output of the function "imfilter" is the filtered image. (5) Compute and record the PSNR value between the original image (converted to type 'double') and the filtered image by using the formulae given above. (6) Repeat steps (3) through (5) using a 5×5 low-pass filter with all coefficients equal to 1/25. Enter the PSNR values you have obtained from your experiments (The PSNR corresponding to 3×3 filter first, followed by the PSNR corresponding to 5×5 filter). Make sure you order the answers correctly and separate them by a space. Enter the numbers to 2 decimal points.

Here's my approach :

I = imread('C:\Users\****\Desktop\digital-images-week2_quizzes-lena.gif'); % read the image
I2 = im2double(I); % convert the uint8 image to double
B = [1/9, 1/9, 1/9; 1/9, 1/9, 1/9; 1/9, 1/9, 1/9]; % create the 3x3 array
C = imfilter(I2, B, 'replicate'); % apply the filter
MSE = mean(mean((I2 - C).^2,2)); % get the MSE
MaxI=1;% the maximum possible pixel value of the images.
PSNR1=10*log10((MaxI^2)/MSE); % get the PSNR
PSNR1 % print the PSNR
B1 = [1/25, 1/25, 1/25, 1/25, 1/25; 1/25, 1/25, 1/25, 1/25, 1/25; 1/25, 1/25, 1/25, 1/25, 1/25; 1/25, 1/25, 1/25, 1/25, 1/25; 1/25, 1/25, 1/25, 1/25, 1/25];
C1 = imfilter(I2, B1, 'replicate');
MSE1 = mean(mean((I2 - C1).^2,2));
PSNR2=10*log10((MaxI^2)/MSE1);
PSNR2

Monday, February 17, 2014

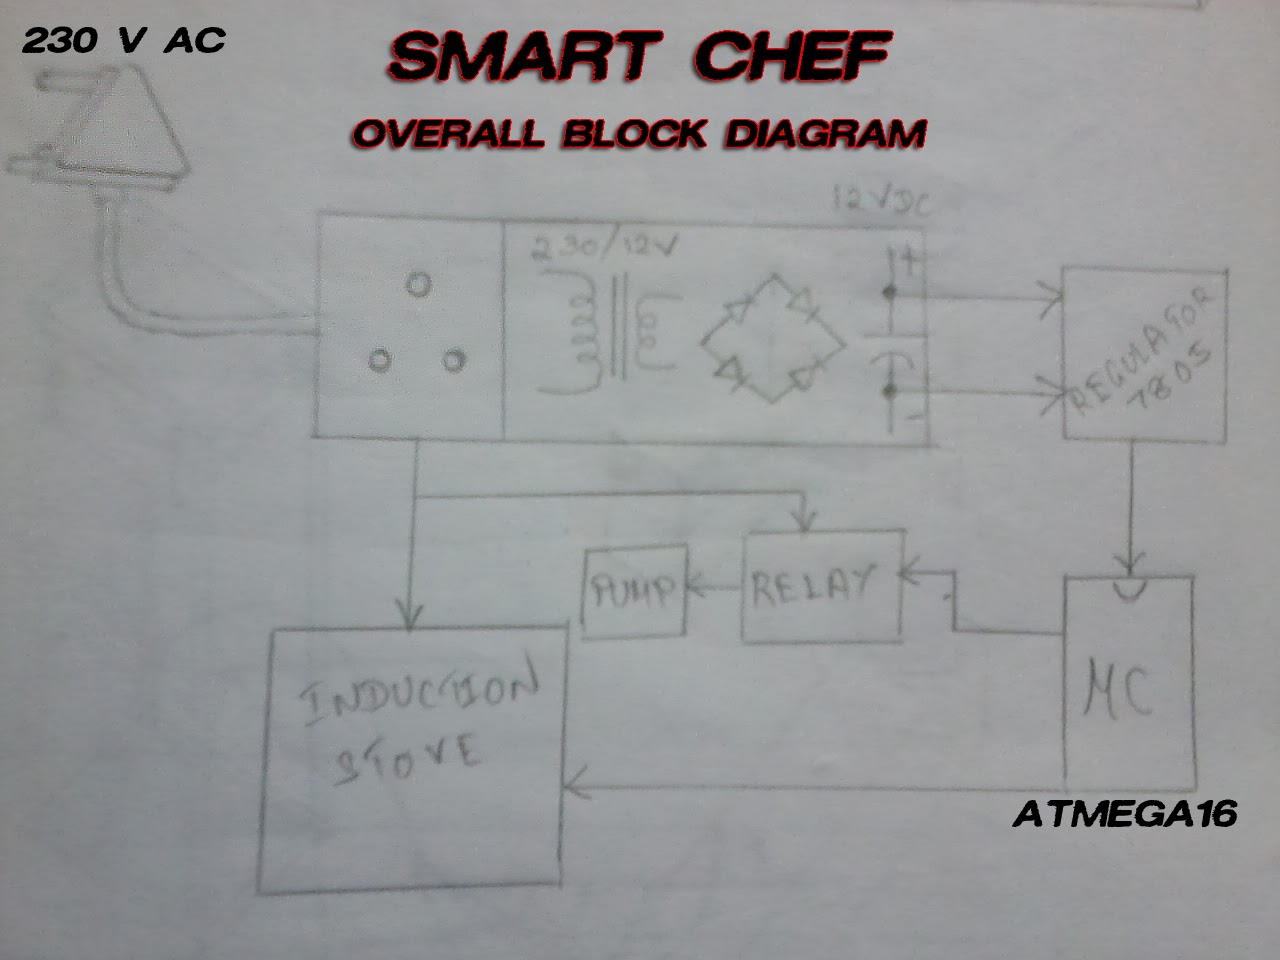
SMART - The Automated Food Concocter! - First Review Experience

Since the time the idea of a food making machine came to my mind, I was in a  browsing spree, looking out for files related to this topic. I wanted my project to be an unique one, as I didn't want to replicate the works of other people. Thankfully, such a robot did not exist.

Thanks to the learning at  iRobotricks workshop conducted by Robosapiens India at NIT, Trichy. It gave a good start for me into the field of robotics and gave me the much required hands on experience. Following this, we had a theory subject, along with lab sessions at college on Microprocessors and Microcontrollers. Here, we learnt to control stepper motors, interfacing keypads and using LED displays. By this time, I had enough online resources and hands on experience to kick start the project.

I teamed up with Mr. Swaminathan Sankaran and Ms. Saranya Murugan. Together, we started working on fabricating the arm. We contacted several fabricators, only to learn that the design posed a grave threat to our goal. We had a clear goal to create a simple, user friendly machine, yet keeping the costs low. With our initial designs, the cost of fabricating the base and arm was so high that we wouldn't be able to commercialize this product in the future. We, thus, had to change the complete design.

The new design was an inspiration from our senior's project titled "Wireless control of a robotic arm". Prof. Sunderaraman was the project guide for that project.

Thus, the new arm looked like this...


Taking inspiration from how a human would pick up an object, we designed the arm with two axis; one for controlling the shoulder (Limb 1) and the other for controlling the elbow (Limb 2). We replaced all the stepper motors with simple DC geared motors. We added another third axis, to actuate the scooper. But this time we used a stepper motor, since we wanted the scooper to open and close precisely. Here is how we designed the various actuators.

Controlling the shoulder...


Controlling the elbow...


Design of the scooper...


We were able to control the individual motors with a development board sporting an ATMEGA16 microcontroller. We had used L293D Dual H-Bridge motor driver to boost the digital output of ATMEGA16. We had also tried interpolating all the three axis. The process required turning certain digital outputs ON and OFF at specific times. All these operations were controlled by digital inputs from the user as well as position sensors. To make the shoulder stop at positions where the ingredient containers were placed, we used feedback from a limit switch. Here's how we interfaced the limit switch on the body of the shoulder.


We had to submit a basic algorithm of the overall process to the review committee. After a lot of brainstorming, we cooked up this algorithm.


Here is a pic of the control board we had developed for controlling the motors.


The first review was a grand success!


Android app development - how to create an APK file

Now that we have developed an app, whats the fun without showing it off to our friends?

Most of us will be aware of what an .apk file means. According to wikipedia, Android application package file (APK) is the package file format used to distribute and install application software and middleware onto Google's Android operating system, and certain other operating systems, such as Blackberry 10 Devices with the OS version 10.2.1. For tech savvy people, here is the link which gives complete details about APK file format.

Here's how we create an .apk file from our Temperature Converter project. The same procedure may be followed for any other project.

Right click on the Temperature Converter project (the required project) from the project explorer and select export.


Select "Export Android Application" under the "Android" folder of the Export window.


Click Next in the Export Android Application window. This window checks if there are any errors in the developed application.


Now, we have to create a key for the application. Select Create new keystroke, select a location to save the keystroke and create a password for the key.


Give specific details about the key. Validity of the key is generally 25 years.


Click finish in the final window. Now, you have successfully exported the project to an .apk file. You can share this file with your friends. Just transfer this file to your android phone and install the file from your phone. 


Sunday, February 9, 2014

SMART - The Automated Food Concocter! - Zeroth Review Experience

I was browsing some old folders on my home PC, while I stumbled upon the folder where I used to store all information I had gathered for my final year project. I was instantly reminded of the good old college days and this nostalgia struck me. I always wanted to blog about how my final year undergraduate project evolved, and clinging on to that nostalgia, I'm penning down what happened back then!

The idea of making a food making machine was lingering in my mind for quite sometime. At that time, I didn't have the idea nor the resources to realize that dream. During that time, I had attended a workshop that taught how to control motors using sensor inputs. As time passed by, I also got myself acquainted with some microprocessor and microcontroller programming skills. I felt that my undergraduate project was the right place to implement the food making machine.

For the first stage, we had to submit the project title and an abstract before the committee for their approvals. Luckily, my department's HOD, Dr. K.R.Santha, agreed to be my project guide. Thus, we began the "titling process". Thanks to my friend Mr. Lakshmi Narayanan Srivatsan for giving us a catchy keyword for the title. "Concoction" is defined as "The act of creating something (a medicine or drink or soup etc.) by compounding or mixing a variety of components". We thus named our robot "SMART - The Automated Food Concocter!". Here the acronym SMART stands for Simple Meal Automated through Robotic Technology. When I tried explaining the concept of this robot to several of my friends, they couldn't understand the idea. Thus, I made some 3D sketches with Google SketchUp (now its Oracle SketchUp) to explain such abstract ideas.


With all these tools, we were able to better convince the review committee to acknowledge our project and also succeeded in luring our department's HOD as the project guide! The project kick starts now...

Wednesday, February 5, 2014

Android app development - Temperature Converter

We displayed our "Hello world!" message in our last post. Now, we'll get our hands on some basic coding. We'll be doing our very own converter app that converts temperature from degree Celsius to Fahrenheit and vice-versa.

We'll start off with a New Android Application.


Create some custom icon for the launcher, like the one below.


Use a blank template for the app and click finish.

We will now create some static attributes for the elements that are going to hold our temperature values. We can also add the static attribute for color, to change the background color of the app.
To add an element, open the file res/values/strings.xml and press the add button.


Now select the Color entry as shown.


Edit the attributes for the Color attribute.


Similarly, create three more String attributes with the following values.


The below image shows the created static attributes placed besides the automatically generated xml code.


Now switch to layout editor by double clicking the activity_main.xml and then switching to Graphical Layout. Right click on the "Hello world!" text and select delete option to delete it. Now add a text field by dragging and dropping the text field box into the layout of the application. Also, drag a RadioGroup and one push button from the Form Widgets tab as shown. Delete one of the radio buttons, as we'll require only two of the three buttons.


Next, we'll proceed by assigning the static attributes which we had previously created to these user interfaces. We'll begin by right clicking on the first radio button and selecting the edit text option.


Select the string attribute "celsius" in the Resource Chooser and click OK.


Similarly assign the attributes "fahrenheit" and "calc" to the second radio button and the push button respectively. Set the checked property of the first radio button to true by right clicking on it.


Set the Input type property of the text input field to numberSigned and numberDecimal.


Now, we'll create the main program. Open the MainActivity.java from the src folder. Type the following code and save the program.

package com.example.temperatureconverter;

import android.app.Activity;
import android.os.Bundle;
import android.view.View;
import android.widget.EditText;
import android.widget.RadioButton;
import android.widget.Toast;
public class MainActivity extends Activity {
private EditText text;
@Override
public void onCreate(Bundle savedInstanceState) {
super.onCreate(savedInstanceState);
setContentView(R.layout.activity_main);
text = (EditText) findViewById(R.id.editText1);
}
// This method is called at button click because we assigned the name to the
// "OnClick property" of the button
public void onClick(View view) {
switch (view.getId()) {
case R.id.button1:
RadioButton celsiusButton = (RadioButton) findViewById(R.id.radio0);
RadioButton fahrenheitButton = (RadioButton) findViewById(R.id.radio1);
if (text.getText().length() == 0) {
Toast.makeText(this,"Please enter a valid number",
Toast.LENGTH_LONG).show();
return;
}
float inputValue = Float.parseFloat(text.getText().toString());
if (celsiusButton.isChecked()) {
text.setText(String.valueOf(convertFahrenheitToCelsius(inputValue)));
celsiusButton.setChecked(false);
fahrenheitButton.setChecked(true);
} else{
text.setText(String.valueOf(convertCelsiusToFahrenheit(inputValue)));
fahrenheitButton.setChecked(false);
celsiusButton.setChecked(true);
}
break;
}
}
// Converts to celsius
private float convertFahrenheitToCelsius(float fahrenheit) {
return ((fahrenheit - 32) * 5 / 9);
}
// Converts to fahrenheit
private float convertCelsiusToFahrenheit(float celsius) {
return ((celsius * 9) / 5) + 32;
}
}


Friday, January 24, 2014

Android app development - Hello world!

We saw about how to install the Android ADT in my previous post. Now we'll see how to develop a basic android app.

Open the "exclipse.exe" application from the "eclipse" folder of the installation directory. Don't get bogged down by the complexity of the layout!
We will now open a new project.
File - New - Android Application Project.

In the New Android Application window that appears, we will give a name to the application. (App names preferably start with a capital letter). The fields "Minimum Required SDK", "Target SDK", "Compile With" and "Theme" are pretty self explanatory from their names. I presume you should be aware of the fact that the version for which you are developing an app should be selected in the "Target SDK" and "Compile With" drop down list boxes. Keep clicking next and hit finish.

Now, if you are witnessing the coding behind android apps for the first time, brace yourself! Even I never expected "Java" to be here! I'm mostly from an electrical and electronics background. Though I had some coding classes at college, that was just at novice level. But, I could manage to grasp some basic concepts and believe me, these basics are more than enough for a hobbyist programmer.

On the left, there is the project explorer pane. As of now, we need to understand just a few areas we are going to meddle with. I've highlighted them for you.


"MainActivity.java" is like the main function of a c program. It is where all the function blocks are brought together and are given their functionality. The "activity_main.xml" file under the "layout" area of the "res" folder is where the various elements (like text input, number input, buttons, etc.) are defined and arranged. This will decide how the layout will look when the app runs on any android platform. Next is the "strings.xml" file under the "values" area of the folder. This is the file that holds the variables that are used in the app.

Open the "activity_main.xml" file. Voila! On the right pane, we can visualize how the app will look like when it is actually running. Don't be baffled. The default blank template comes with a "Hello world!" message already!

You may need to select the Graphical Layout tab to see this.


Now that we are done with the development, we need to run it, to see it live!
We have two options;
  • Simulate on a virtual android device.
  • Use a real android device.
We'll see how both work individually.

Running the app on a simulated device.

We have to first create a simulated device in order to run the app in it. Lets begin by clicking on the Window menu and selecting the Android Virtual Device Manager. Click New to add a new Android Virtual Device (AVD).

Give the AVD a name. I'll name it vijay. I've used Nexus 4 as the Device and "Android 4.2.2 - API Level 17" as the Target. All the remaining setting depend on the hardware configuration of your laptop or PC that is currently running the eclipse application. If you use host GPU, you'll have a faster emulation, at the cost of your laptop's graphic card! Additionally, you can select the snapshot option to optimize the speed. This will save the last state of the emulator while you close it, so that it will start quickly on your next run. (Obviously, the first run will be slower.) Close the Virtual Device Manager.

Select the "MainActivity.java" file from the Project Explorer by double clicking it. Click the run button on the tool bar or under the run menu (Ctrl + F11 is the shortcut). In the window that appears, select run as "Android Application" and click OK.

In the Android Device Chooser window, select the virtual device you just created and click OK. Now, wait patiently till the device boots up. This really tests the degree of patience in us, especially if the processor of your laptop is slow!

And when its done, its celebration time!


To maximize the emulator, use the shortcut Alt+Enter.
To change the orientation of the emulator, use Ctrl+F11.
To toggle network ON or OFF, use F8 key.


Running the app on a real device.

If you own a real android device, you could relish the fun of watching your first app perform in your own device. Firstly, you may need to enable "Developer options". It was openly available in previous versions of android. But from the version 4.2.2, they are hidden. To reveal this option, open "About device" from the settings menu and tap on the "Build number" several times. Now enable "USB debugging" under the Developer options. Connect the phone to your laptop. The USB driver will automatically be installed from the OEM site.

Now every time you click the run button in the eclipse application, you have an option to run the Android application on either the virtual device you created above or your phone.

Kudos! You've just experienced your first android app on your own phone!


Android app development - What lured me to it!

The invention of telephone was definitely one of the finest inventions of mankind! I'm quite fascinated on witnessing the development from the then wired, bulky telephones to the present wireless mobiles. The past decade has seen tremendous development in the way we interact with our fellow humans. I still remember the days when cordless phones were first used; I used to wonder how such a thing is even possible! And then there was this "pager", going viral among the business class. Within a few years, came the mobile phones. At that time, I didn't fathom that this technology would be the future of a revolution in the communication industry. Now I know exactly where we are heading to; at least in the present scenario dominated by the Android market!

Since the day I bought my first android device, I was always curious to know how things worked. I've always been raring to understand how android apps worked, but procrastinating, thinking that this was just for the computer geeks. But things proved wrong when I started experimenting. I'm writing this blog to share my experiences on how to develop apps for the android OS.

Lets get started straight away!

As of today's world, everything starts with a Google search! I too started off with those generic words, "how to create android apps".

The android development software is a freeware and can be downloaded from the following link. For the comfort of beginners, the download package consists of all prerequisites that are needed for the proper functioning of this software.

http://developer.android.com/sdk/index.html

After downloading the Android SDK from the above link, extract the contents of the file to the root folder. (i.e. C drive for most cases). You could extract them into a folder called "Development".
One word of caution is not to move or rename any of the folders. This may render certain internal links unusable and we may need to manually reestablish the links.

So finally, the installation path will be C:/Development/adt-bundle-windows-x86-20131030

Inside this "adt-bundle-windows-x86-20131030" folder, there are three folders (eclipse, sdk and workspace). We'll be developing apps using the "eclipse.exe" application in the "eclipse" folder. The workspace folder will contain the backups of the apps we develop. Additionally, there is one "SDK Manager.exe" application in the "adt-bundle-windows-x86-20131030" folder. This is used to install add-ons. For eg. the Android ADT will presently install only the  files required for running the apps in 4.4 (kitkat) version. If you want to run the app in a different platform, Jelly Bean say, you have to manually download the required files for version 4.2.

Now, give yourself a pat on the back for successfully installing the Android ADT. We'll see about displaying the generic "Hello world" message in our first android app in the next post!