Wednesday, February 5, 2014

Android app development - Temperature Converter

We displayed our "Hello world!" message in our last post. Now, we'll get our hands on some basic coding. We'll be doing our very own converter app that converts temperature from degree Celsius to Fahrenheit and vice-versa.

We'll start off with a New Android Application.


Create some custom icon for the launcher, like the one below.


Use a blank template for the app and click finish.

We will now create some static attributes for the elements that are going to hold our temperature values. We can also add the static attribute for color, to change the background color of the app.
To add an element, open the file res/values/strings.xml and press the add button.


Now select the Color entry as shown.


Edit the attributes for the Color attribute.


Similarly, create three more String attributes with the following values.


The below image shows the created static attributes placed besides the automatically generated xml code.


Now switch to layout editor by double clicking the activity_main.xml and then switching to Graphical Layout. Right click on the "Hello world!" text and select delete option to delete it. Now add a text field by dragging and dropping the text field box into the layout of the application. Also, drag a RadioGroup and one push button from the Form Widgets tab as shown. Delete one of the radio buttons, as we'll require only two of the three buttons.


Next, we'll proceed by assigning the static attributes which we had previously created to these user interfaces. We'll begin by right clicking on the first radio button and selecting the edit text option.


Select the string attribute "celsius" in the Resource Chooser and click OK.


Similarly assign the attributes "fahrenheit" and "calc" to the second radio button and the push button respectively. Set the checked property of the first radio button to true by right clicking on it.


Set the Input type property of the text input field to numberSigned and numberDecimal.


Now, we'll create the main program. Open the MainActivity.java from the src folder. Type the following code and save the program.

package com.example.temperatureconverter;

import android.app.Activity;
import android.os.Bundle;
import android.view.View;
import android.widget.EditText;
import android.widget.RadioButton;
import android.widget.Toast;
public class MainActivity extends Activity {
private EditText text;
@Override
public void onCreate(Bundle savedInstanceState) {
super.onCreate(savedInstanceState);
setContentView(R.layout.activity_main);
text = (EditText) findViewById(R.id.editText1);
}
// This method is called at button click because we assigned the name to the
// "OnClick property" of the button
public void onClick(View view) {
switch (view.getId()) {
case R.id.button1:
RadioButton celsiusButton = (RadioButton) findViewById(R.id.radio0);
RadioButton fahrenheitButton = (RadioButton) findViewById(R.id.radio1);
if (text.getText().length() == 0) {
Toast.makeText(this,"Please enter a valid number",
Toast.LENGTH_LONG).show();
return;
}
float inputValue = Float.parseFloat(text.getText().toString());
if (celsiusButton.isChecked()) {
text.setText(String.valueOf(convertFahrenheitToCelsius(inputValue)));
celsiusButton.setChecked(false);
fahrenheitButton.setChecked(true);
} else{
text.setText(String.valueOf(convertCelsiusToFahrenheit(inputValue)));
fahrenheitButton.setChecked(false);
celsiusButton.setChecked(true);
}
break;
}
}
// Converts to celsius
private float convertFahrenheitToCelsius(float fahrenheit) {
return ((fahrenheit - 32) * 5 / 9);
}
// Converts to fahrenheit
private float convertCelsiusToFahrenheit(float celsius) {
return ((celsius * 9) / 5) + 32;
}
}


Friday, January 24, 2014

Android app development - Hello world!

We saw about how to install the Android ADT in my previous post. Now we'll see how to develop a basic android app.

Open the "exclipse.exe" application from the "eclipse" folder of the installation directory. Don't get bogged down by the complexity of the layout!
We will now open a new project.
File - New - Android Application Project.

In the New Android Application window that appears, we will give a name to the application. (App names preferably start with a capital letter). The fields "Minimum Required SDK", "Target SDK", "Compile With" and "Theme" are pretty self explanatory from their names. I presume you should be aware of the fact that the version for which you are developing an app should be selected in the "Target SDK" and "Compile With" drop down list boxes. Keep clicking next and hit finish.

Now, if you are witnessing the coding behind android apps for the first time, brace yourself! Even I never expected "Java" to be here! I'm mostly from an electrical and electronics background. Though I had some coding classes at college, that was just at novice level. But, I could manage to grasp some basic concepts and believe me, these basics are more than enough for a hobbyist programmer.

On the left, there is the project explorer pane. As of now, we need to understand just a few areas we are going to meddle with. I've highlighted them for you.


"MainActivity.java" is like the main function of a c program. It is where all the function blocks are brought together and are given their functionality. The "activity_main.xml" file under the "layout" area of the "res" folder is where the various elements (like text input, number input, buttons, etc.) are defined and arranged. This will decide how the layout will look when the app runs on any android platform. Next is the "strings.xml" file under the "values" area of the folder. This is the file that holds the variables that are used in the app.

Open the "activity_main.xml" file. Voila! On the right pane, we can visualize how the app will look like when it is actually running. Don't be baffled. The default blank template comes with a "Hello world!" message already!

You may need to select the Graphical Layout tab to see this.


Now that we are done with the development, we need to run it, to see it live!
We have two options;
  • Simulate on a virtual android device.
  • Use a real android device.
We'll see how both work individually.

Running the app on a simulated device.

We have to first create a simulated device in order to run the app in it. Lets begin by clicking on the Window menu and selecting the Android Virtual Device Manager. Click New to add a new Android Virtual Device (AVD).

Give the AVD a name. I'll name it vijay. I've used Nexus 4 as the Device and "Android 4.2.2 - API Level 17" as the Target. All the remaining setting depend on the hardware configuration of your laptop or PC that is currently running the eclipse application. If you use host GPU, you'll have a faster emulation, at the cost of your laptop's graphic card! Additionally, you can select the snapshot option to optimize the speed. This will save the last state of the emulator while you close it, so that it will start quickly on your next run. (Obviously, the first run will be slower.) Close the Virtual Device Manager.

Select the "MainActivity.java" file from the Project Explorer by double clicking it. Click the run button on the tool bar or under the run menu (Ctrl + F11 is the shortcut). In the window that appears, select run as "Android Application" and click OK.

In the Android Device Chooser window, select the virtual device you just created and click OK. Now, wait patiently till the device boots up. This really tests the degree of patience in us, especially if the processor of your laptop is slow!

And when its done, its celebration time!


To maximize the emulator, use the shortcut Alt+Enter.
To change the orientation of the emulator, use Ctrl+F11.
To toggle network ON or OFF, use F8 key.


Running the app on a real device.

If you own a real android device, you could relish the fun of watching your first app perform in your own device. Firstly, you may need to enable "Developer options". It was openly available in previous versions of android. But from the version 4.2.2, they are hidden. To reveal this option, open "About device" from the settings menu and tap on the "Build number" several times. Now enable "USB debugging" under the Developer options. Connect the phone to your laptop. The USB driver will automatically be installed from the OEM site.

Now every time you click the run button in the eclipse application, you have an option to run the Android application on either the virtual device you created above or your phone.

Kudos! You've just experienced your first android app on your own phone!


Android app development - What lured me to it!

The invention of telephone was definitely one of the finest inventions of mankind! I'm quite fascinated on witnessing the development from the then wired, bulky telephones to the present wireless mobiles. The past decade has seen tremendous development in the way we interact with our fellow humans. I still remember the days when cordless phones were first used; I used to wonder how such a thing is even possible! And then there was this "pager", going viral among the business class. Within a few years, came the mobile phones. At that time, I didn't fathom that this technology would be the future of a revolution in the communication industry. Now I know exactly where we are heading to; at least in the present scenario dominated by the Android market!

Since the day I bought my first android device, I was always curious to know how things worked. I've always been raring to understand how android apps worked, but procrastinating, thinking that this was just for the computer geeks. But things proved wrong when I started experimenting. I'm writing this blog to share my experiences on how to develop apps for the android OS.

Lets get started straight away!

As of today's world, everything starts with a Google search! I too started off with those generic words, "how to create android apps".

The android development software is a freeware and can be downloaded from the following link. For the comfort of beginners, the download package consists of all prerequisites that are needed for the proper functioning of this software.

http://developer.android.com/sdk/index.html

After downloading the Android SDK from the above link, extract the contents of the file to the root folder. (i.e. C drive for most cases). You could extract them into a folder called "Development".
One word of caution is not to move or rename any of the folders. This may render certain internal links unusable and we may need to manually reestablish the links.

So finally, the installation path will be C:/Development/adt-bundle-windows-x86-20131030

Inside this "adt-bundle-windows-x86-20131030" folder, there are three folders (eclipse, sdk and workspace). We'll be developing apps using the "eclipse.exe" application in the "eclipse" folder. The workspace folder will contain the backups of the apps we develop. Additionally, there is one "SDK Manager.exe" application in the "adt-bundle-windows-x86-20131030" folder. This is used to install add-ons. For eg. the Android ADT will presently install only the  files required for running the apps in 4.4 (kitkat) version. If you want to run the app in a different platform, Jelly Bean say, you have to manually download the required files for version 4.2.

Now, give yourself a pat on the back for successfully installing the Android ADT. We'll see about displaying the generic "Hello world" message in our first android app in the next post!

Sunday, September 8, 2013

CNC System from Parker

I'm very excited after performing trial runs on our demo gantry system at office.
It all started off with the urgency to complete off the programming of the gantry system, destined for the Automation Expo, happening at Mumbai this 23rd.

With Parker's MotionMax 9000 front end, ACR 9640 Controller, Compax3 Servo Drives, SMB Servo Motors, PS series Gear Heads, EL series Belt actuators and ETH series Ball Screw actuators, the demo gantry was a full fledged system, depicting the breadth of Parker Products. This MotionMax 9000 is a GUI between the ACR Controller and PC. It has the ability to convert .NC files to direct motion, and that's the best part!

Here is a sample which I had developed for the expo...


Sunday, July 11, 2010

Why not try these Browsers???


When it comes to web browsers, Internet Explorer, Firefox, Opera, Safari, and Google’s Chrome get all the attention. But they’re not the only web browsers on the market, nor are they necessarily the best.
While you’ve probably never heard of Flock, K-Meleon, and Maxthon, these three alternative browsers offer features so innovative that once you try them out, you just might feel compelled to add them to your permanent stable of web browsing tools. Find out why….
FLOCK
Flock bills itself as “the social web browser” and it has more hooks with popular web technologies than any other browser. With Flock’s “Accounts and Services” sidebar, for instance, you can aggregate and communicate with your friends from most of the popular social networking sites while you surf other sites. With the Photo Upload feature, you can either drag photos from your computer or select multiple images from a folder, and Flock will resize them and send them on to Picasa, Photobucket, or TinyPic.
If you have a blog you can add blog entries directly from Flock using the browser’s built-in Blog Editor.
Add links in the side panel to Gmail, Yahoo Mail, and instant messaging in the same Accounts and Services sidebar, and Flock gives you nearly instant access to most of what you’re likely to be doing online today. Log on to a site that offers content or RSS feeds, for instance, and Flock will alert you to their presence, instructing you how to use the orange feed button to add the site to your list of feeds. Flock feels as fast and stable as IE or Firefox. IE users, in particular, will be able to adopt Flock with virtually no retraining, since most of the keyboard shortcuts – including those to access Favourites are identical.
K-MELEON
If what you want in a web browser is speed, along with a healthy dose of customizability, then K-Meleon will be worth your time. This little-known browser was launched specifically to be easy on system resources and therefore speedy where other browsers are not.
Even during installation, K-Meleon gives you the option of installing a pre-loader that promises to increase browser load times by keeping a portion of the browser’s code in memory at all times. Even without benchmarks, complex pages load noticeably faster than with either IE or Firefox, as both graphics and text appear almost simultaneously. Keyboard shortcuts and menus resemble those in Firefox.
A handy sessions menu allow you to save multiple browser tabs to one shortcut, meaning that if you regularly have 10  web sites open, you can reopen them all with one click. K-Meleon allows you to set up multiple user profiles so that each person who uses a computer can have a unique browser set up.
There are the usual browser-specific options that are accompanied by a host of advanced configuration settings, mouse accelerators, bookmark options, and view settings.

MAXTHON
Originally developed in China, Maxthon is different in some immediately noticeable ways, including its interface, which is bereft of the standard title bar, giving you more browser space in which to view web pages. Virtually everything about the interface can be customized. In this “no interface” mode, Maxthon is more Spartan even than Google’s Chrome. The effect makes Maxthon a notable solution for viewing web pages on small notebook screens.
Virtually every feature in the browser is accessible with the keyboard. You can even assign the function keys on your keyboard to open specific web pages, and you can create “web aliases,” which allow you to open a web site or groups of sites merely by typing a few letters or a word into the address bar. A unique Groups menu makes short work of saving a set of open tabs to a single shortcut. The browser also comes with some useful tools, including a full-featured form-filler, a flexible screen capture utility, a “file sniffer” that can help you find the web addresses of videos and a “collector” or notepad feature that can save your thoughts from session to session.
There’s a complete skinning system as well, which allows you to change the look and feel of the browser. Add it all up, and you have a browser that should have the major players taking notice.


COURTESY: GUARDING NEWSPAPERS LIMITED 2010

Wednesday, June 23, 2010

Simulate your hairstyle and choose your haircolor thru your pocket pc!!!

Digital Hairstyle 3.6 for Windows Mobile

It is an ultimate Hair Stylist application for you, with over 100 hairstyles, unlimited number of hair colors, ability to add any photo available on your pocket PC. Go ahead and surprise yourself. it features more than 100 hairstyles from short, medium, long, fancy and men. You can add moustaches for a perfect gentleman fit. Default comes with 12 color palates. You can insert your own photos.

JAP - anonymity and privacy online!!!

Project: AN.ON - Anonymity.Online
Protection of Privacy on the Internet

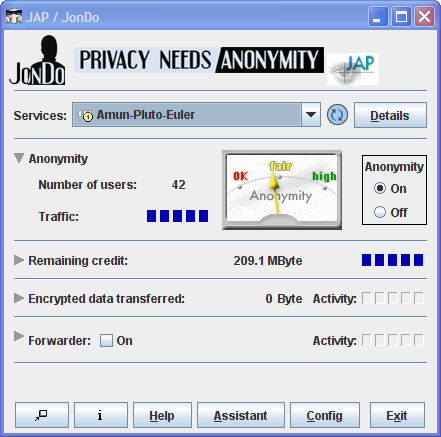
JAP makes it possible to surf the Internet anonymously and unobservably. Without Anonymization, every computer in the internet communicates using a traceable Address. That means the website visited, the Internet service provider (ISP), and any eavesdropper on the internet connection can determine which websites the user of a specific computer visits. Even the information which the user calls up can be intercepted and seen if encryption is not used. JAP uses a single static address which is shared by many JAP users. That way neither the visited website, nor an eavesdropper can determine which user visited which website.


How it works


Instead of connecting directly to a webserver, users take a detour, connecting with encryption through several intermediaries, so-called Mixes. JAP uses a predetermined sequence for the mixes. Such a sequence of linked mixes is called a Mix Cascade. Users can choose between different mix cascades.

Since many users use these intermediaries at the same time, the internet connection of any one single user is hidden among the connections of all the other users. No one, not anyone from outside, not any of the other users, not even the provider of the intermediary service can determine which connection belongs to which user. A relationship between a connection and its user could only be determined if all intermediaries worked together to sabotage the anonymization. more...

The intermediaries (mix providers) are generally provided by independent institutions which officially declare, that they do not keep connection log files or exchange such data with other mix providers. JAP shows the identity and number of organisations in each Mix cascade in detail, and verifies this information by cryptographic means. The users are thus able to selectively choose trustable mix cascades.

Grab your free copy at: http://anon.inf.tu-dresden.de/download_en.html
alternatively: http://download.cnet.com/JAP/3000-2213_4-10671702.html

its small and downloads in seconds!!!

happy browsing anonymously!!!